Tour
Here is a quick rundown of the key concepts to handle when you're just starting to use tours.
Tours are designed to help users discover the different features and functionality of the kApp in an interactive way. To generate them, we use the vue3-tour library on which we have added several additional features.
WARNING
You will first have to follow the required steps to create your account then connect to make everything works as expected.
You can run the tutorial from this link, or open the application at the right place then click on the following icon in the main menu. 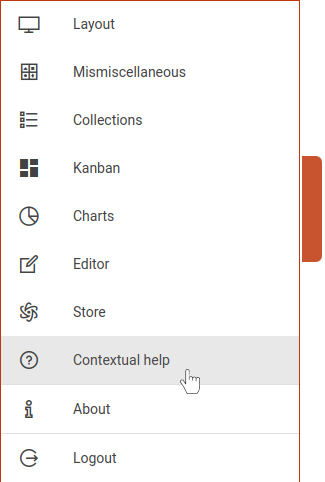
TIP
To open the main menu use the handle on the left side of your screen.
You can then follow the step by step guide (or key), go back if required (or key) and stop anytime (or escape key) as illustrated by the following figure: 
Configuration
The tour configuration in the kApp depends on how many tours you want to associate with a route.
Set of tours associated with a route
To configure multiple tours associated with a route, you must add a tour object to the route configuration in the src/router/routes.js file. Example of configuration to associate two tours to the layout route:
configuration example
layout: {
  name: 'layout-activity',
  component: 'LayoutActivity',
  tour: {
    home: tours.home,
    'side-nav': tours['side-nav']
  }
}
TIP
You can launch a tour using a query parameter with tour=tour-name.
Only one tour associated with a route
To configure a single tour associated with a route, you must:
- Add a tour property to the route configuration in the
src/router/routes.jsfile.
configuration example
login :{
  component: 'screen/KLoginScreen',
  tour: tours.login
}- Add to the route the query parameter
{ tour: true }in theconfig/default.jsfile. For example,route: { name: 'login', query: { tour: true } }
TIP
You can launch a tour using a query parameter with tour=true.
Usage
Tours are located in the src/tours folder. When you launch the kApp generic tours are automatically copied from the kdk. They are configured using a JavaScript file exporting an array of objects. Each object describes a step of a tour with the following properties:
target: HTML element you want to highlighttitle: Title of the targeted element (String or translation key)content: Brief description of the targeted element (String or translation key)link: Textual content of the link (String or translation key)params: Object that allows to define additional parametersplacement: Defines the orientation of the tour step relative to the target element. Possible values aretop,bottom,leftandright. If this property is not specified, the default value isbottomblockOnMiss: HTML element that allows to block the tour if it is not found in the pageclickOnLink: HTML element you want to simulate a click on when the link is clickedtour: Name of the tour to load if the link is clickedclickOn: HTML element on which a clik is generated at the beginning of the stepclickDelay: Time in milliseconds beforeclickOnis executedclickOnNext: HTML element on which a click is generated when the next button is clickednextDelay: Time in milliseconds before the execution of the next stepclickOnPrevious: HTML element on which a click is generated when the previous button is clickedpreviousDelay: Time in milliseconds before the execution of the previous step
TIP
All HTM elements mentioned in the documentation can use either an ID (#my-element) or a more complex CSS selector (div[component="layout/Footer"])
TIP
Any property starting with clickOn can also be an array of HTML elements. In this case, it is advisable to add a delay. Also, if you want to add a hover effect you can use the keyword hover (e.g. hoverClickOnLink)
side-nav.js configuration example
module.exports = [{
  target: '#logout',
  title: 'tours.home.LOGOUT_LABEL',
  content: 'tours.home.SESSION_LABEL',
  params: {
    placement: 'top',
    clickOnNext: '#left-opener',
  }
}, {
  target: '#contextual-help',
  content: 'tours.home.CONTEXT_HELP_LABEL',
  params: {
    placement: 'top',
    clickOnPrevious: '#left-opener',
    clickOnNext: '#left-opener'
  }
}, {
  target: '#about',
  content: 'tours.home.ABOUT_LABEL',
  params: {
    placement: 'top',
    clickOnPrevious: '#left-opener',
    clickOnNext: ['#left-opener', '#about'],
    nextDelay: 500
  }
}, {
  target: '#report-bug',
  content: 'tours.home.BUG_LABEL',
  params: {
    placement: 'top',
    clickOnPrevious: ['#ok-action', '#left-opener'],
    clickOnNext: '#ok-action',
    previousDelay: 500
  }
}]